Установка на сервере IIS (Internet Information Services). Если Вы знаете, что такое IIS сервер (он входит в любую поставку Windows XP), то можно использовать следующий вариант установки.
1. Проверьте наличие следующих программных решений на вашем компьютере:
- IIS (Internet Information Services)
- Framework 2.0
- SQL Server 2000 или 2005,
2. Распакуйте файл DotNetNuke_04.05.03_Install.zip в папку с:\Test и откройте полные права для группы NetworkService
3. Откройте IIS и создайте виртуальный каталог, используя следующие параметры
а) Название Тест
б) Папка с:\Test
в) Права доступа: чтение, запуск сценариев, запись
3. Откройте свойства виртульного каталога и проверьте настройки
а) в папку Документы добавьте Default.aspx, если файла там нет
б) в папке asp.net устновите версию 2.0, если стоит версия 1.0
4. Откройте Internet Explorer и запустите команду: http://localhost/test Вид картинки следующий.
 |
DotNetNuke Installation Wizard - Version 04.05.03
Welcome to the DotNetNuke Installation Wizard. This wizard will guide you through the installation of your DotNetNuke Application.
You may navigate through the Wizard using the Next and Previous buttons. On some pages you will see a third button "Test ...". This button will allow you to test the configuration before you continue, to see the effects of changes.
The first step is to select the installation method to use and to choose the language you would like to use for the Installation.
Select Installation Method:
|
|
Choose Language:
|
|
|
|
|
Можно попытаться установить Auto и нажать кнопку Next. Вид установки будет такой же, как при установке в Visual Studio, но мы пойдем другим путем и выберим более сложный вариант установки Custom, чтобы почувствовать всю "прелесть" настройки сервера SQL и CRM DNN На этом этапе настройки DNN, система проверяет доступ к вашим папке test. Вдруг Вы забыли первоначальный совет и не открыли доступ на ЗАПИСЬ к test. Нажмите ссылку  Test Permissions (Тестирование доступа). Если все нормально, то появиться сообщение: Your site passed the permissions check. Ваш сайт прошел тестирование.
|
Checking File Permissions
DotNetNuke has extensive file upload capabilities for content, modules, and skins. These features require custom security settings so that the application is able to create and remove files in your website.
This page checks the current file permissions to ensure that these features will work correctly.
File Permissions Summary:
|
|
|
После того, как мы протестировали успешно разрешения нажмите кнопку Next, иначе откройте доступ к папке test (уже пятый раз об этом говорим) и откройте к ней полный доступ. Перед вами отобразиться окно, как показано ниже. Настройки даны для удаленного сайта, если их сделать сейчас, то потом при администрировании сайта не надо указывать его реальный адрес. Сайт из-за этого не запустится. Вот они:
Нажмите  Test Database Connection, появиться текст Connection Success (успешное соединение), если этого нет, то проверьте наличие базы на сервере и доступ пользователя userdb. Далее нажмите Next.
|
Configure Database Connection
You can configure the database settings used by DotNetNuke on this page. If you are installing DotNetNuke in a "Hosting Account" your hosting provider should have provided you with the information.
There are two options for SQL Server 2005. SQLServer 2005 supports the use of Database Files. In most situations you should choose the Database option, but if you are using SQL Server 2005 Express then you should use the File option.
| Server: |
|
Введите имя сервера, например, 234.234.567.234 или NB\SQLserver или sql.site.ru и т.п. Информацию запросите у провайдера вашего сайта.
Enter the Name or IP Address of the computer where the Database is located. (if using Oracle enter the Data Source (SID)) |
| Database: |
|
Введите имя базы данных, ее должен создать администратор сервера провайдера
Enter the Database name |
| Integrated Security: |
|
Уберите флажок, т.к. доступ будет вестись удаленно через регистрацию на сервере.
Check this if you are using SQL Server's Integrated Security, which means you will be using your Windows account to access SQL Server. If you are using SQL Server Express then you will most likely need to check this option. If you have been given a UserId/Password to access your Database, leave this unchecked, and provide the UserId/Password combination. |
| User ID: |
|
Введите имя, его также дает провайдер сайта. Enter the UserID for the Database |
| Password: |
|
Введите пароль, его также дает провайдер сайта Enter the Password for the Database |
| Run as db Owner: |
|
Отметьте флажок, хотя это не принципиально. Check this if you are running the database as Database Owner - if left unchecked you will be running as the User ID specified |
| Object Qualifier: |
|
Введите префикс dnn, тогда все таблицы, виды, процедуры будут иметь название с dnn. Это упростит обслуживание сайта, если Вы решите покопаться в его структуре и добавить свои модули. Так легче отличать решения сайта от ваших. Enter an optional "prefix" to use for all your database objects - this helps ensure that there are no object name clashes. |
Connection Success |
|
|
Появиться еще окно. Вы должны нажать кнопку Next и дождаться установки скриптов:
Installing Database - Version 4.4.0...Success
Upgrading Database to Version 4.4.1...Success
Upgrading Database to Version 4.5.0...Success
Upgrading Database to Version 4.5.1...Success
Upgrading Database to Version 4.5.2...Success
Upgrading Database to Version 4.5.3...Success
Installation of Database Complete
После этого нажать кнопку Next
|
Run Database Installation Scripts
The installation of the database scripts should have started when this page loaded. The Next button will be disabled until the Installation of the Scripts is complete.
Installing Database Scripts ...
|
|
|
Далее ведется настройка доступа к сайту. Пароли должны иметь длину не менее 7 символов, иначе будет ошибка как указано ниже.
host - это администратор всех сайтов, т.е. портала
admin - это администратор 1 сайта, он имеет индекс 0
Configure Host User
Host User Error:
The password must be at least 7 characters.
На этом этапе можно выбрать модули для установки. Часть модулей устанавливается принудительно. Что делают модули можно прочитать в разеделе Dotnetnuke
Install Optional Modules
Modules
Нажмите Next и введите пароль для администратора сайта.
|
Install Host Portal
In this page you will configure the Host (or initial) Portal (website).
You will need to provide an administrator user account. This user has access to all functionality of the portal, and as with the Host User care should be taken to provide a UserName/Password combination that is difficult to "hack" by malicious users.
Portal Administrator
Portal Properties
|
|
|
Установка скинов и контейнеров. Их у Вас не будет, поэтому нажмите кнопку Next
|
Install Optional Skins and Containers
DotNetNuke has a rich skinning capability. On this page you can choose the optional Skins and Containers to install.
Installing a Skin and/or container does not automatically enable it, but it makes the skin availalble to you.
Skins
No Optional Skins to Install
Containers
No Optional Containers to Install
|
|
|
Установка языков. Их у Вас тоже не будет, жмем Next.
|
Install Language Packs
DotNetNuke is fully localizable. On this page you can choose the languages you wish to install.
Installing a Language does not automatically enable it, but it makes the language available to you.
Languages
There are no languages to install.
|
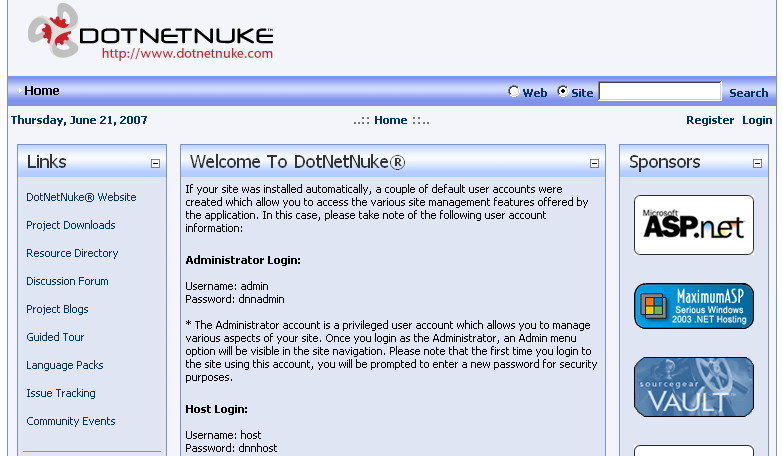
Настройка завершена. Нажимаем Finished (Goto Site) переход на сайт. Это все
|
Congratulations
Congratulations, you have successfully installed DotNetNuke.
|
|
|